How to Unwrap Models with Triplanar Mapping in Blender
 Mika
Mika- Updated Sep 7, 2025
Instead of unwrapping every landscape object manually, create a triplanar mapping shader to unwrap them based on their location in the 3D space.
Creating the Triplanar Mapping
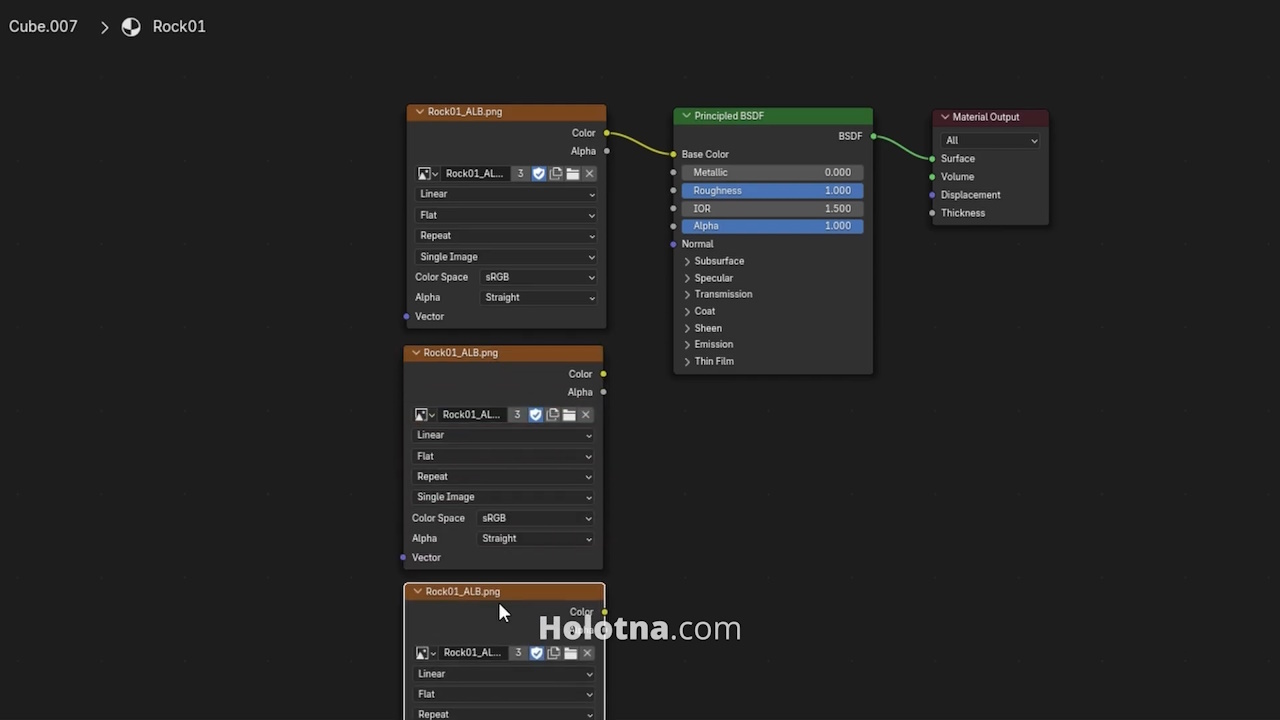
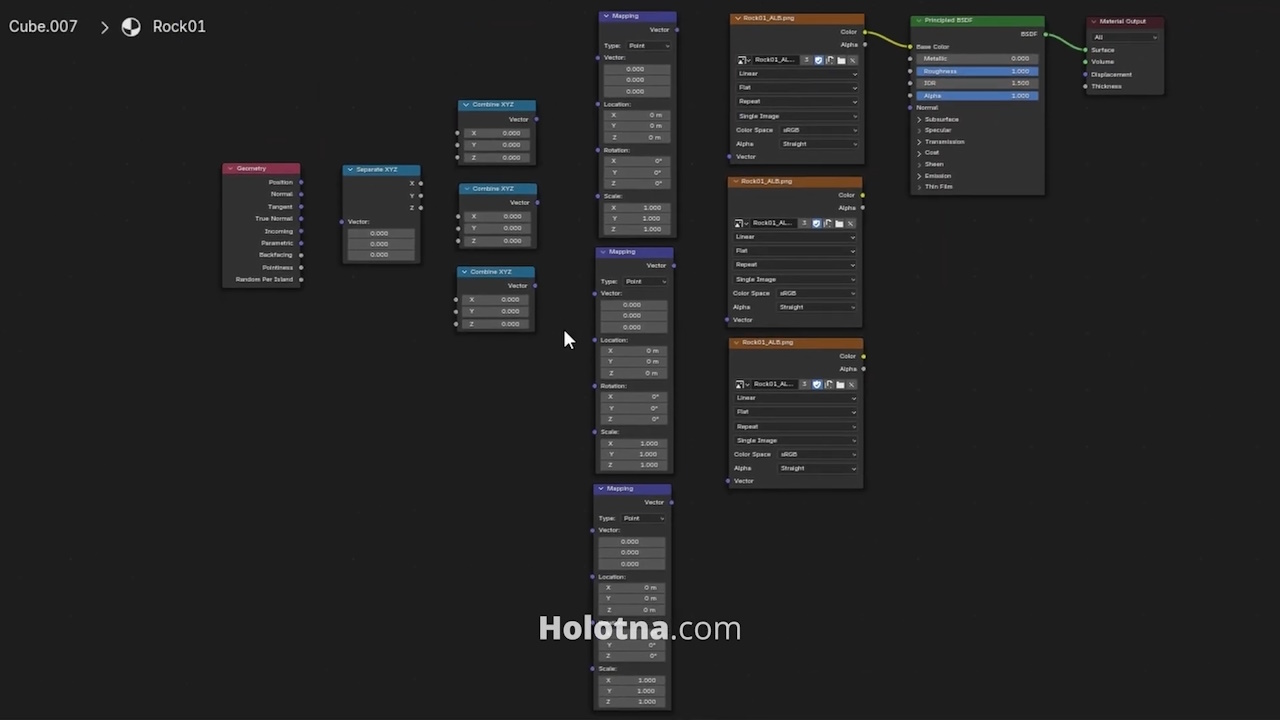
To create a triplanar mapping shader, you’ll need a seamless texture. The triplanar mapping method projects the texture from top, side and front then blends between them. This means three Image Texture nodes are needed so duplicate the node twice with CTRL + D.
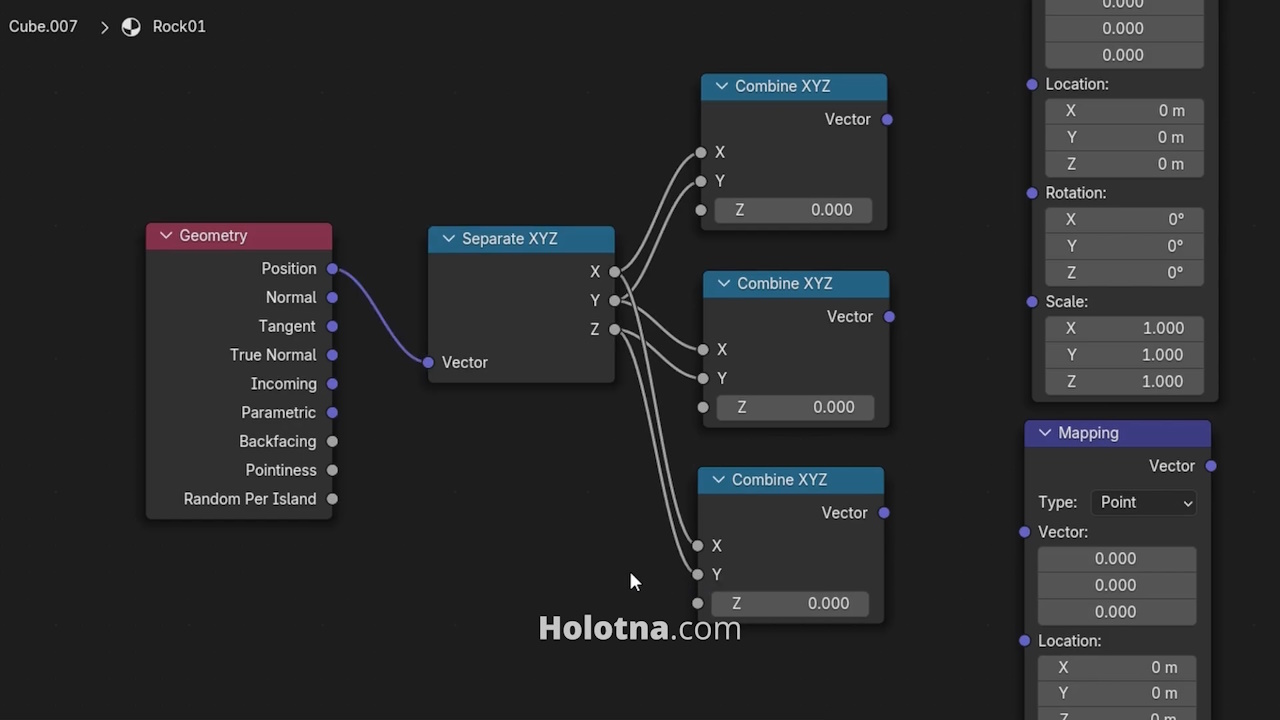
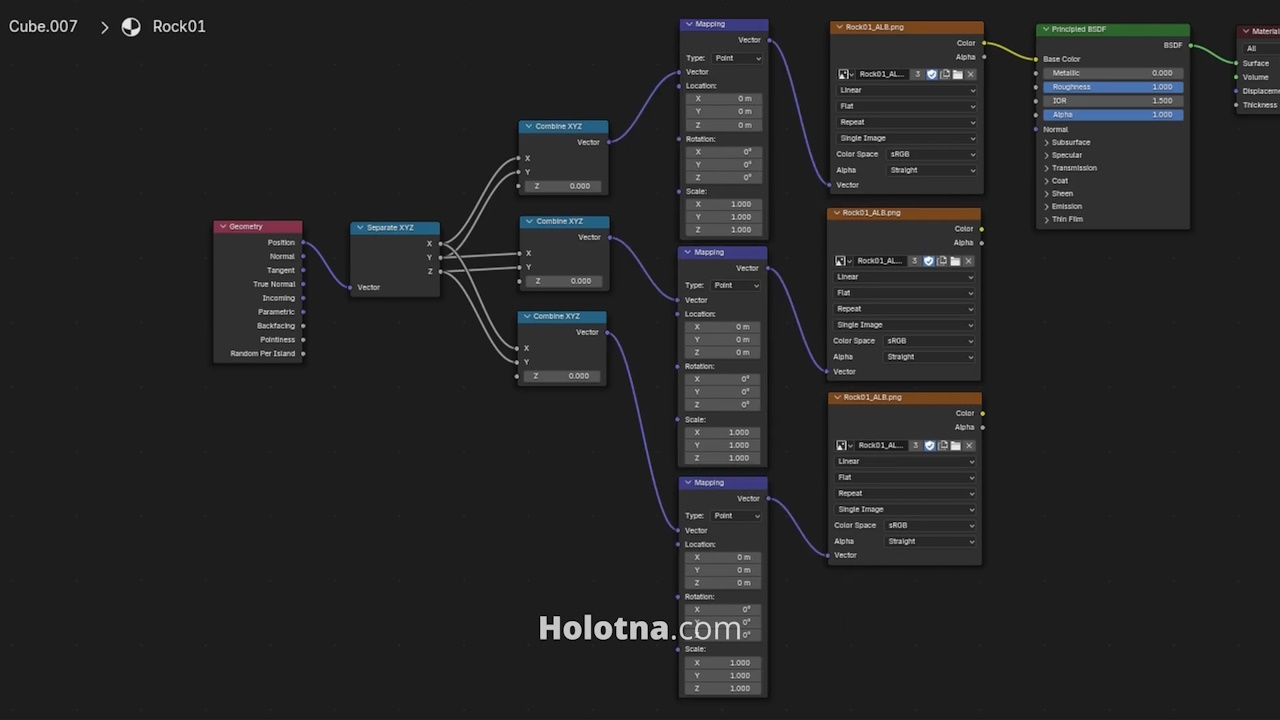
To start creating the triplanar mapping, add a Geometry node, a Separate node, three Combine nodes and three Mapping nodes.
Connect the Geometry node’s Position output to the Separate node.
The first texture will be projected from the top so combine the X and Y outputs of the Separate node. The second texture will be projected from the side so use the Y and Z and the third one gets projected from the front so use X and Z.
Connect the Combine nodes to the Mapping nodes. Then connect the Mapping nodes to the Image Texture nodes.
To blend the three textures, add two Mix Color nodes and connect the nodes just like this.
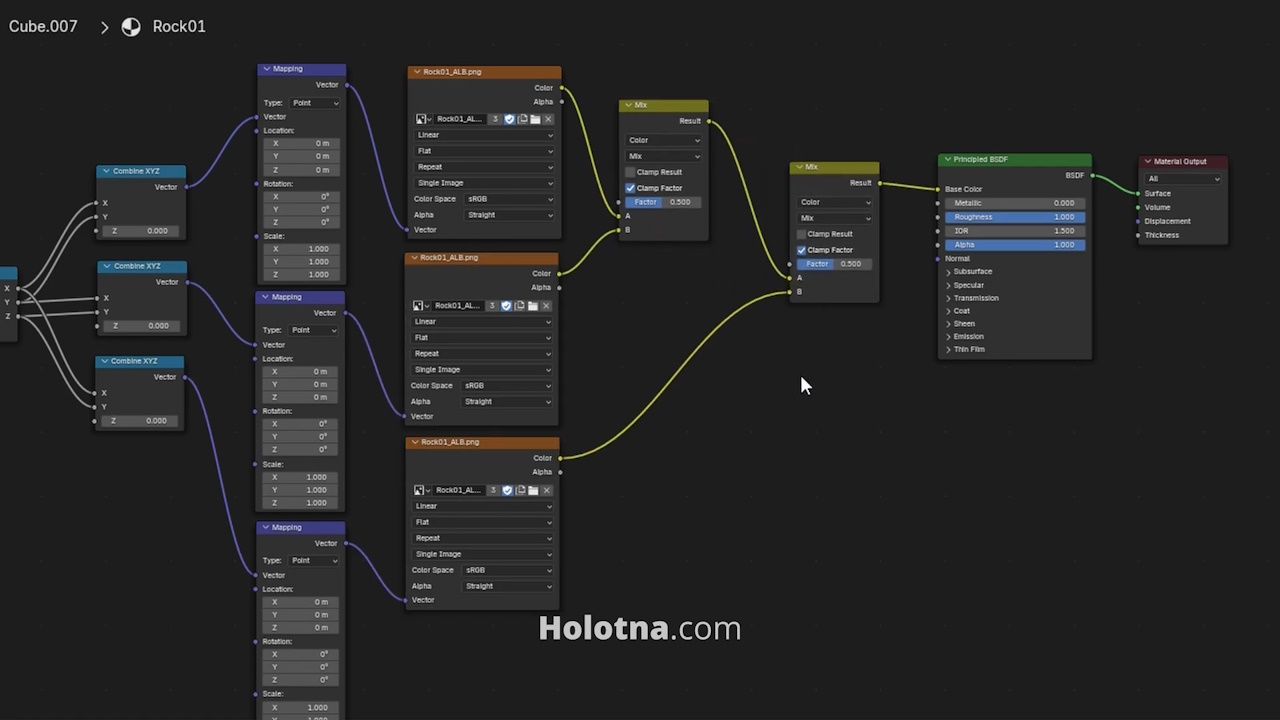
To get the desired outcome we’ll use the normals of the model and connect that information to the Factor input of the Mix Color nodes.
Add a Separate node and two Math nodes. Change the type of both Math nodes to Absolute.
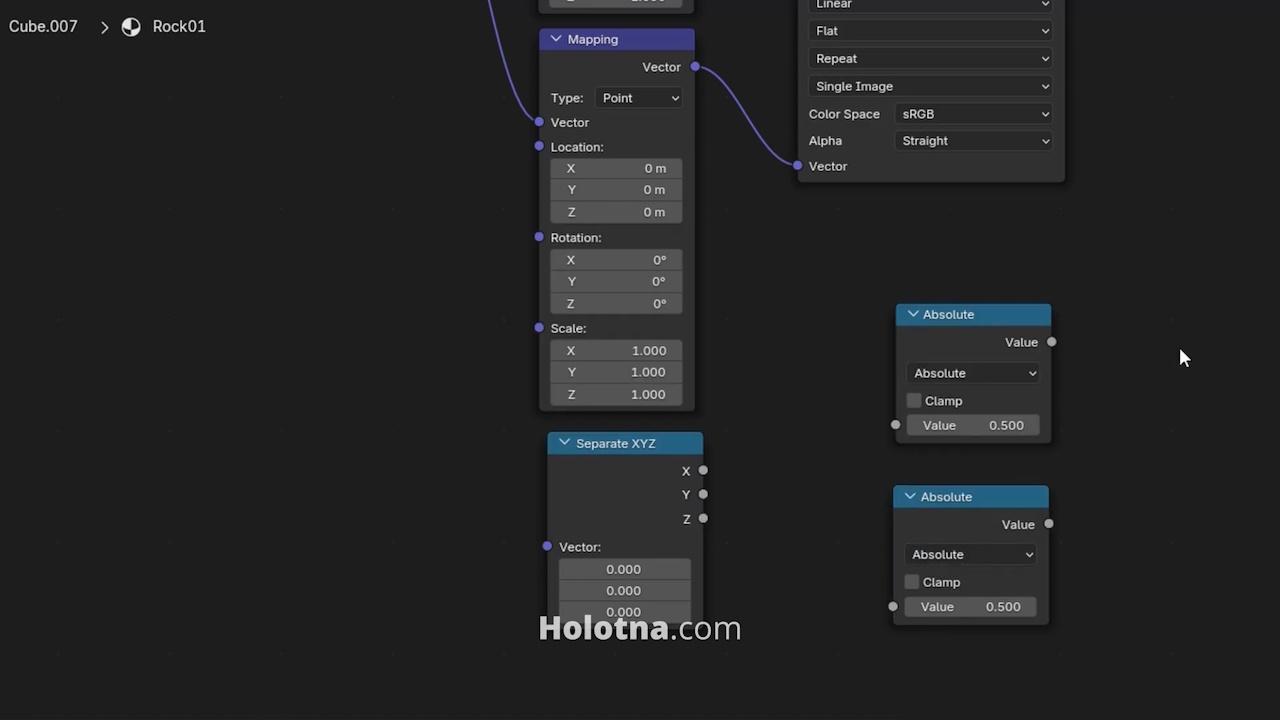
Connect the Geometry node’s Normal or True Normal output to the new Separate node. Try which one gives you the best results.
Now connect the Separate node to the Math nodes and the Math nodes to the Mix Color nodes like so.
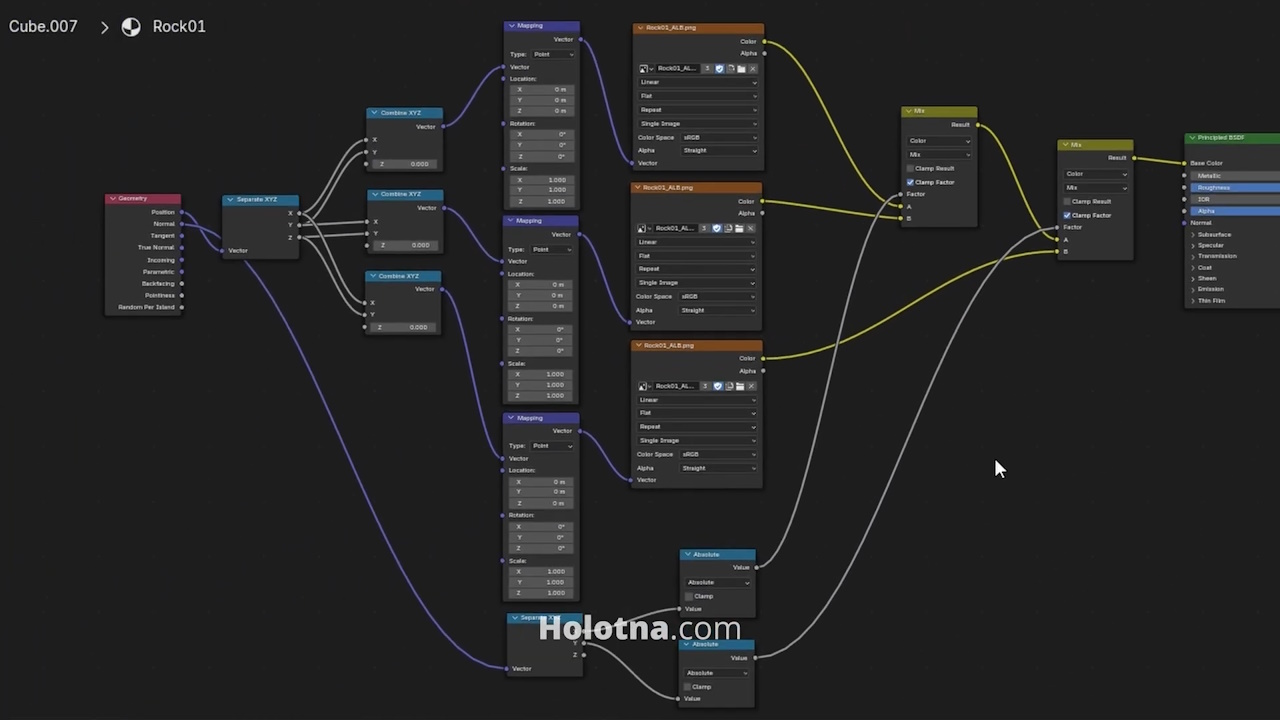
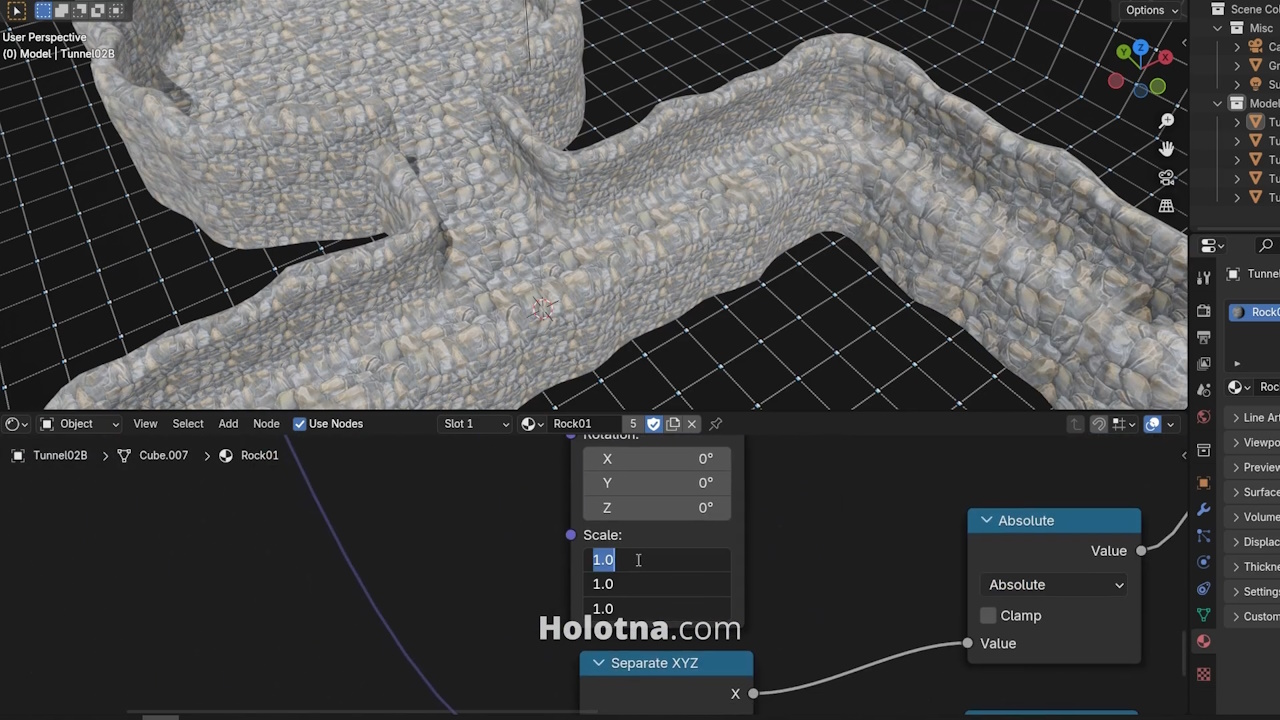
Lastly, modify the Scale of each Mapping node to change the tiling of the triplanar mapping.