How to Drop Models into a Container in Blender
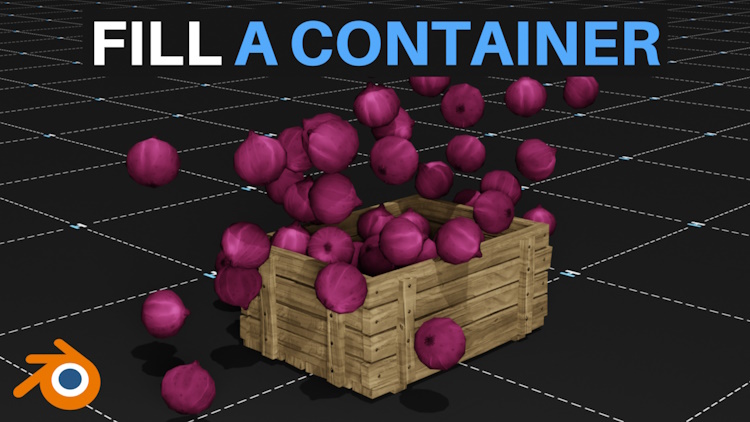
In this article you'll learn how to use Blender's Rigid Body physics to fill a container with onions.
Preparing the Objects
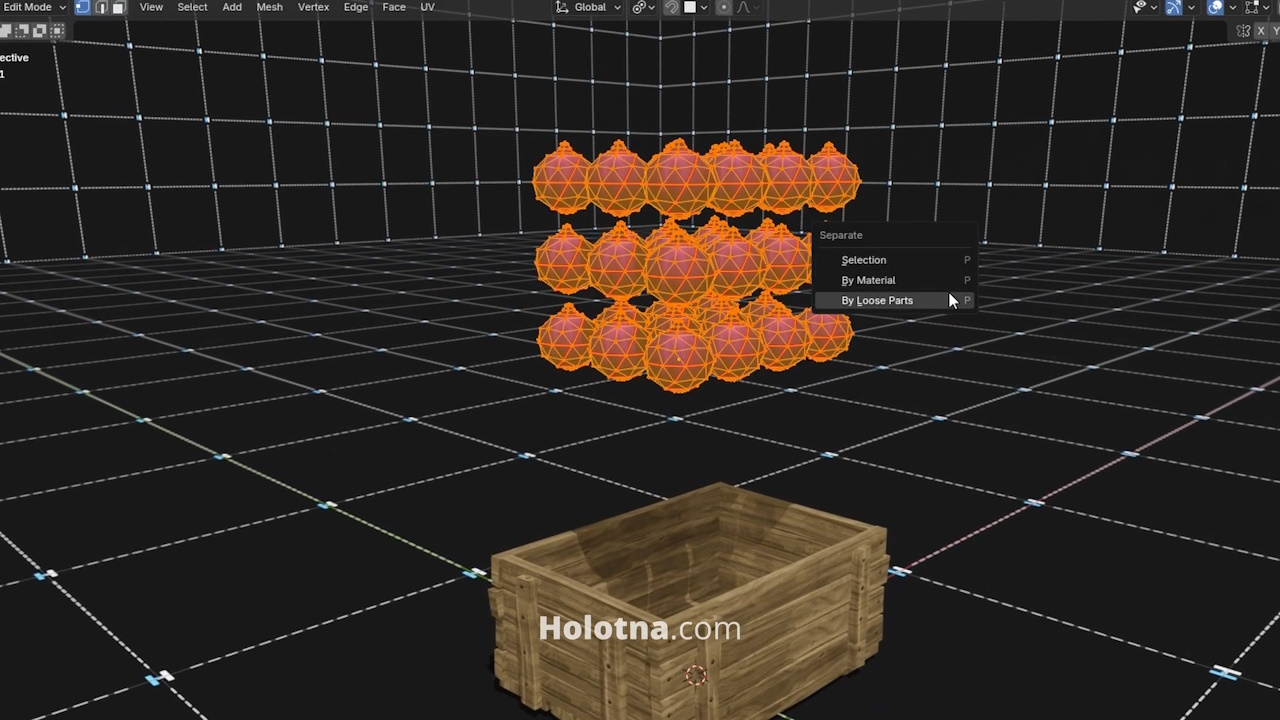
First, make sure to separate your objects by switching to Edit mode, pressing P and selecting By Loose Parts.
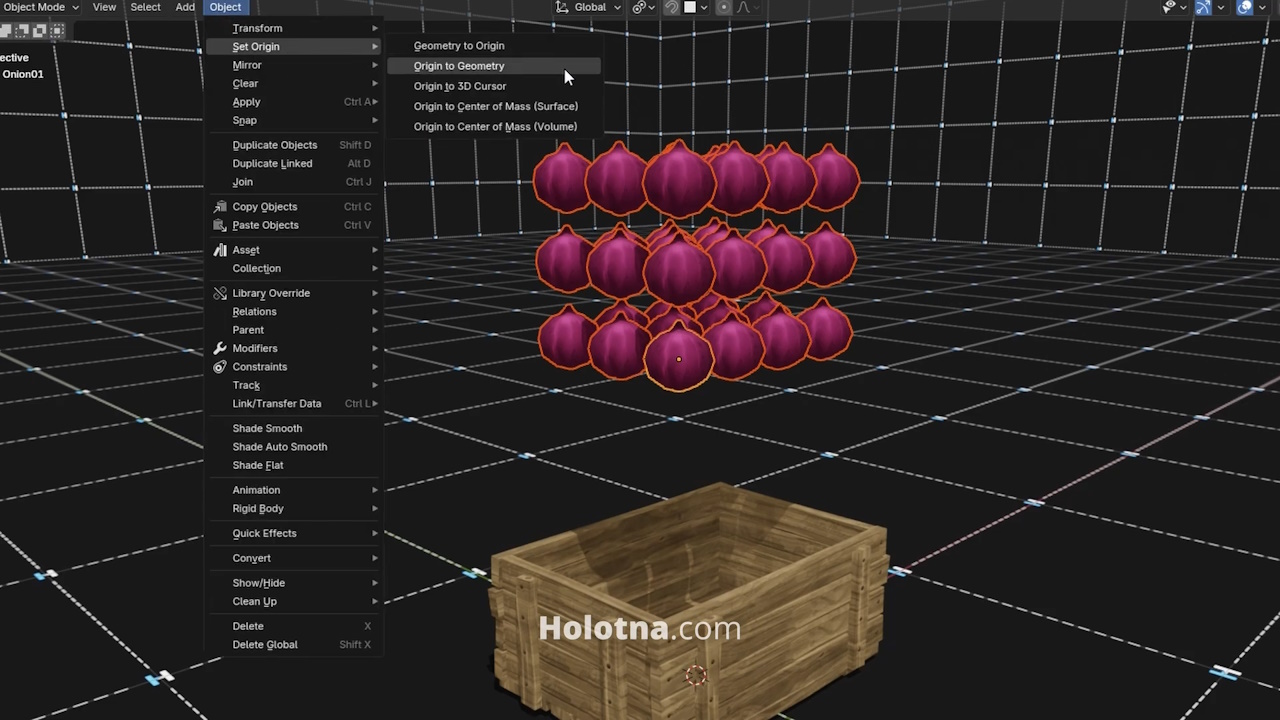
Switch back to Object mode and set the pivot points to the center of the objects by going to Object > Set Origin > Origin to Geometry.
Adding Rigid Body Physics
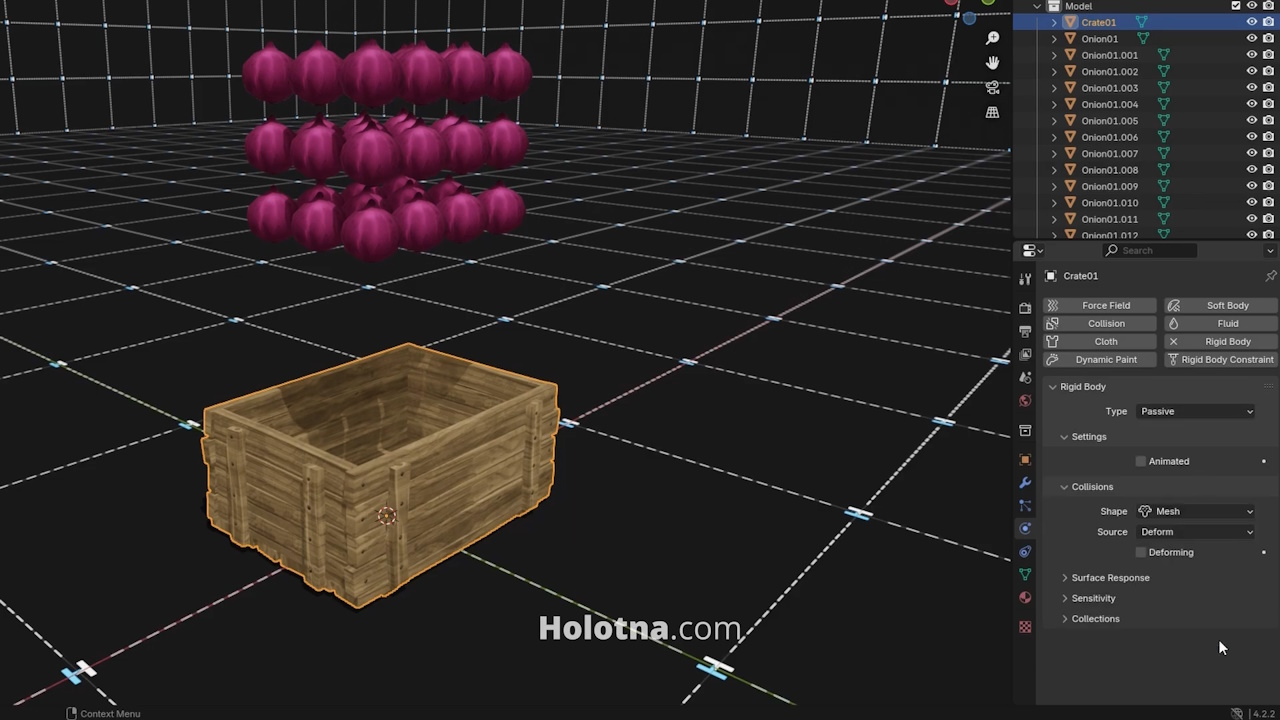
Select the container and open the Physics tab. Add the Rigid Body and change its type to Passive and Shape to Mesh.
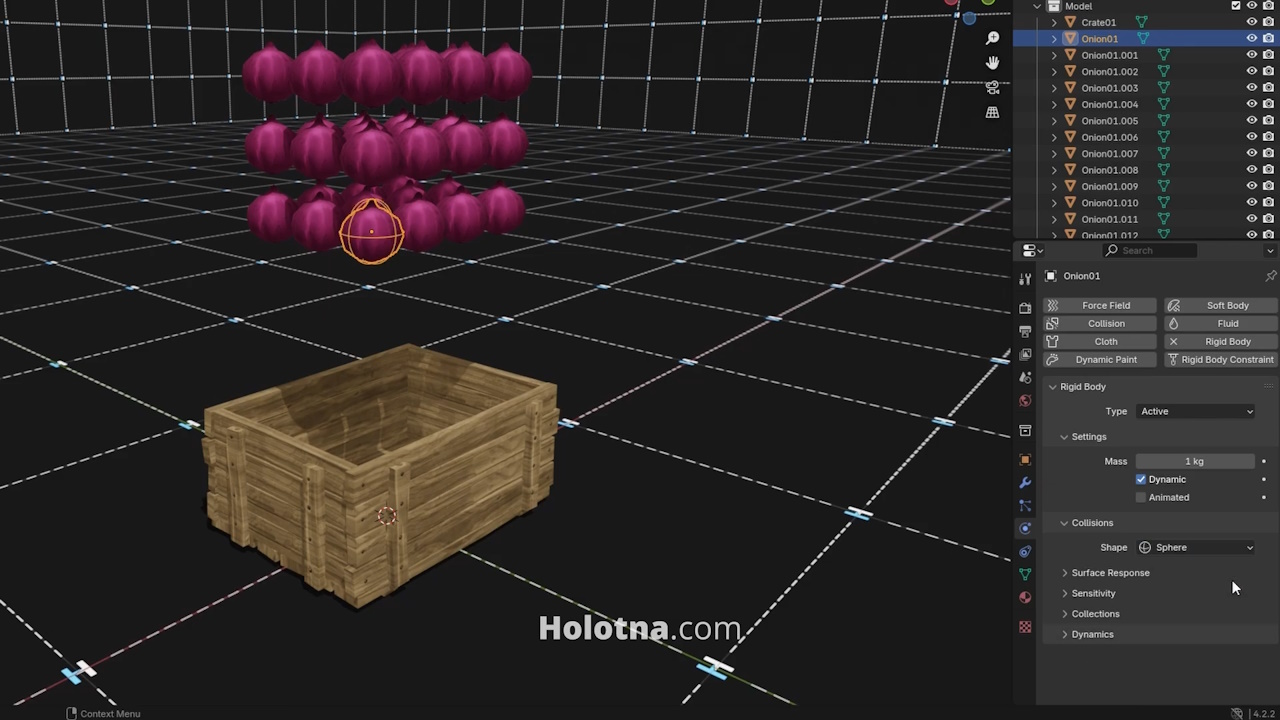
Now, select one of the objects and add the Rigid Body to it. You can try different shapes to see which one gives you the best results but for now let’s go with Sphere.
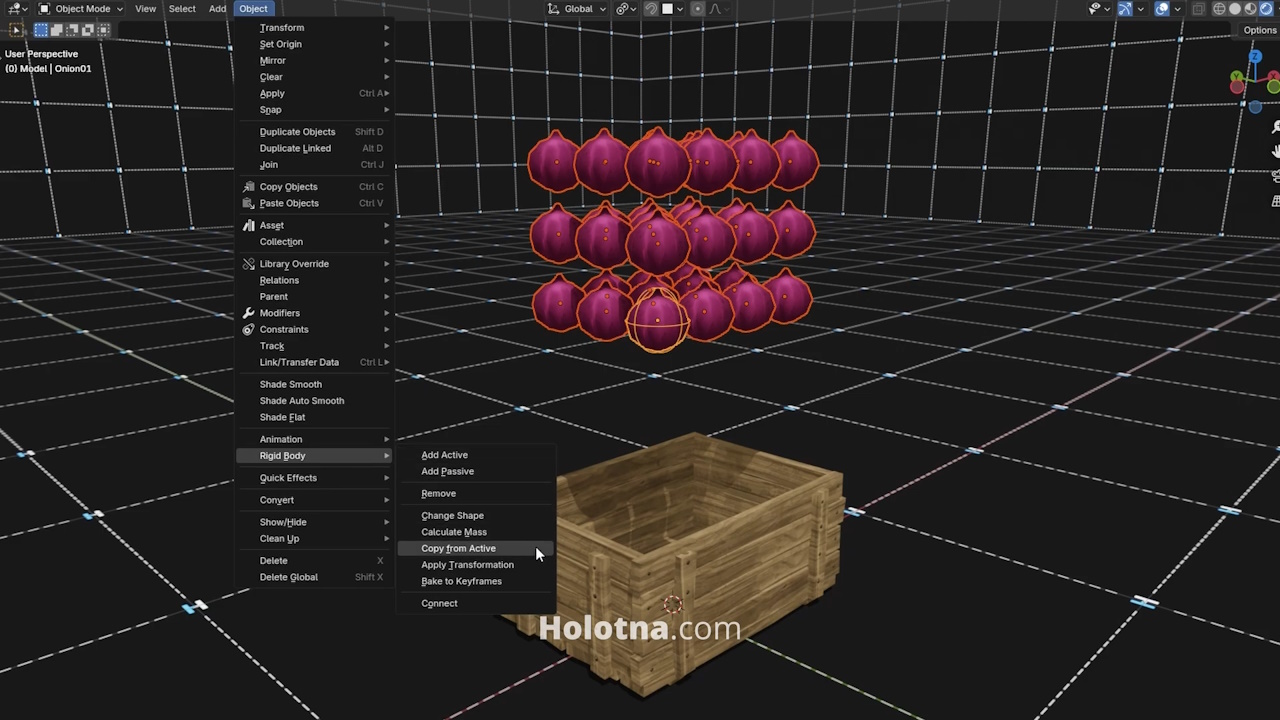
To copy the Rigid Body and its settings to the rest of the objects, hold down SHIFT and select them, and lastly select the object that already has the Rigid Body. Go to Object > Rigid Body > Copy from Active.
Baking the Simulation
Open the Timeline window and play the simulation. Stop the animation when you’re happy with the results.
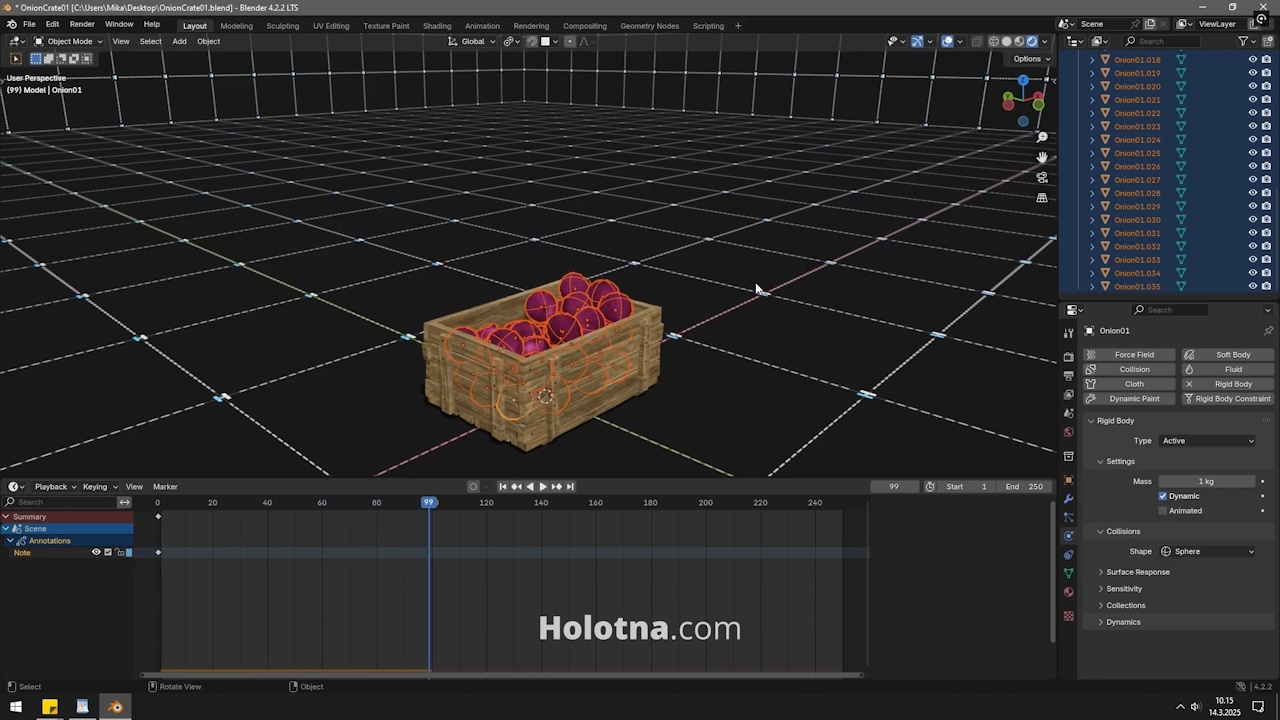
Make sure to have all the objects selected and go to Object > Rigid Body > Bake to Keyframes. Click OK.
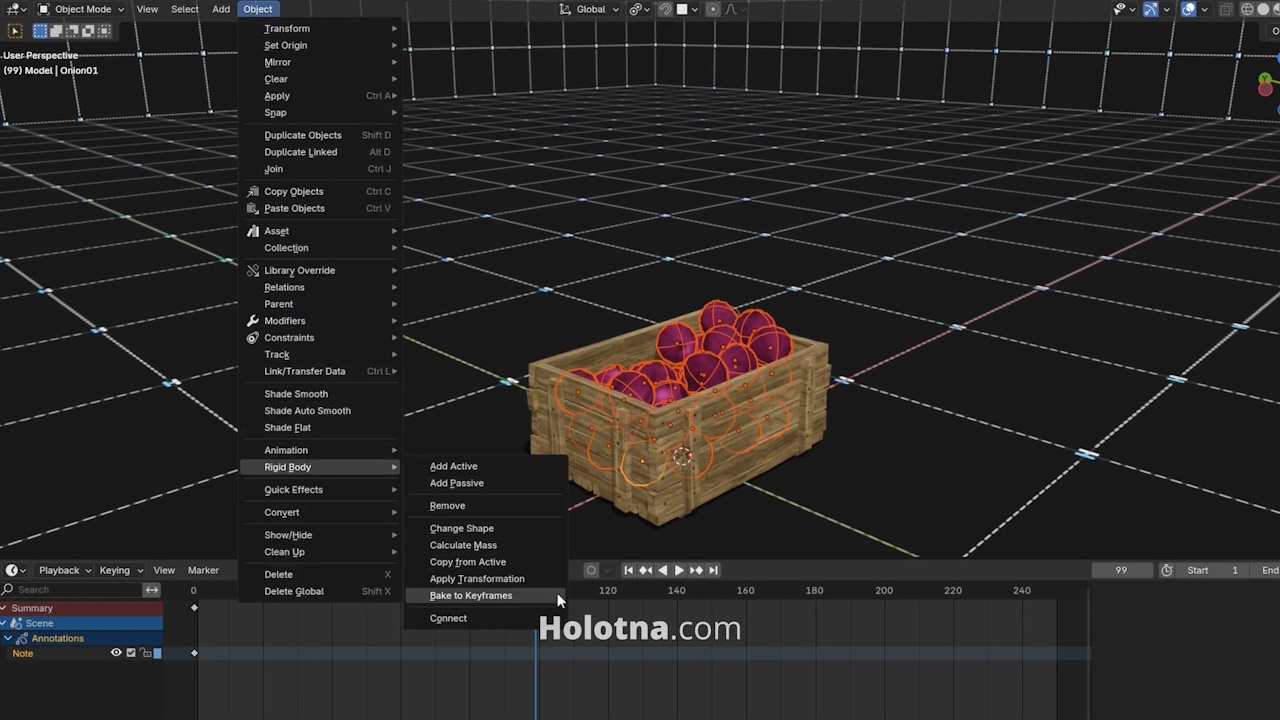
Join the selected objects with CTRL + J. To remove the animation, expand the object in the Outliner window, right click its animation and choose Clear Animation Data.
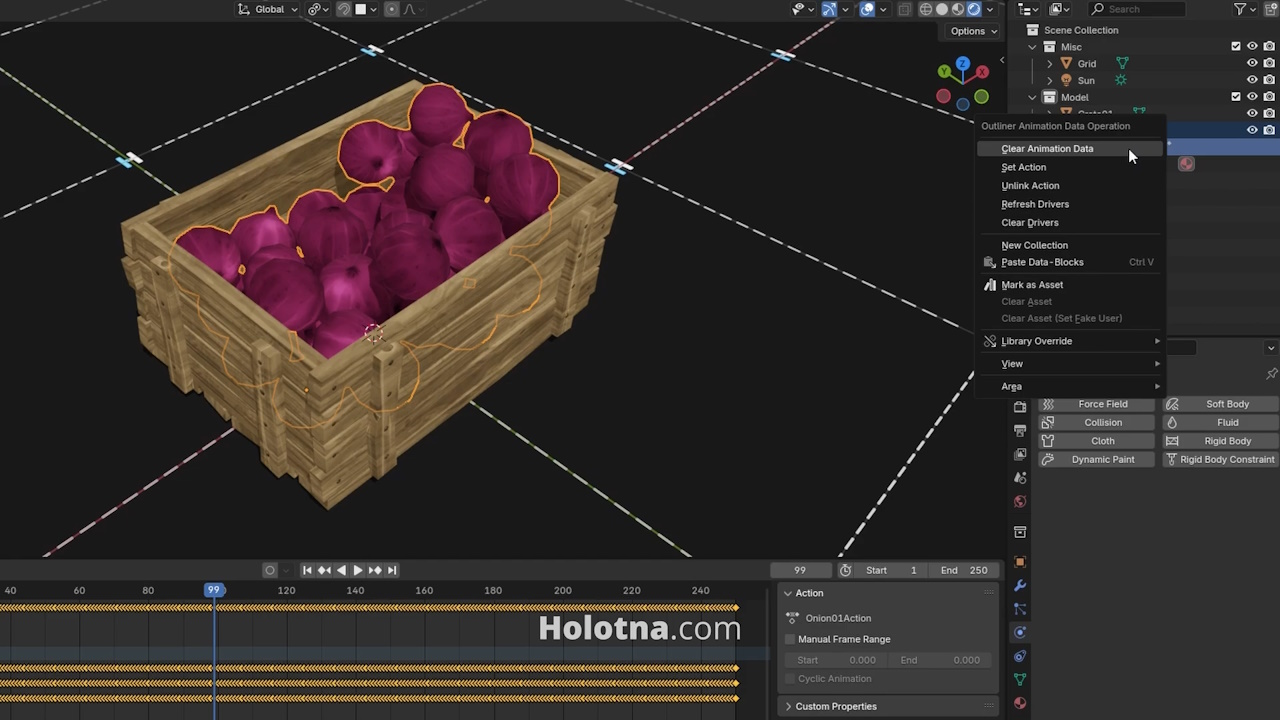
Select the container and remove its Rigid Body. Now you can select both objects and join them with CTRL + J.
